Contents of This Page
Map Drag and Drop
- Drag and Drop Overview
- Drag to Add Parts
- The Start of Drag - the "Drag Clone"
- Highlighted Drop Zones
- Drag Add Text Entry
- Drag and Drop for Map Adds
- Drag and Drop to Move Parts
- Special Case for Moving Sub-Processes
Drag and Drop Overview
▪ Drag and drop can be for two purposes
▪ Adding Map Parts
▪ Moving Map Parts
▪ Drag and drop is available if the Drag to Add parts shapes are displayed at the top of the Map panel, as shown below in the red rectangle.
▪ Drag and Drop is automatically turned off during certain activities where Map changes are not allowed.
Drag and Drop is also explained in the
"Play with a Map - What to Do"
training video which can be seen at this page.
"Drag to Add" Parts
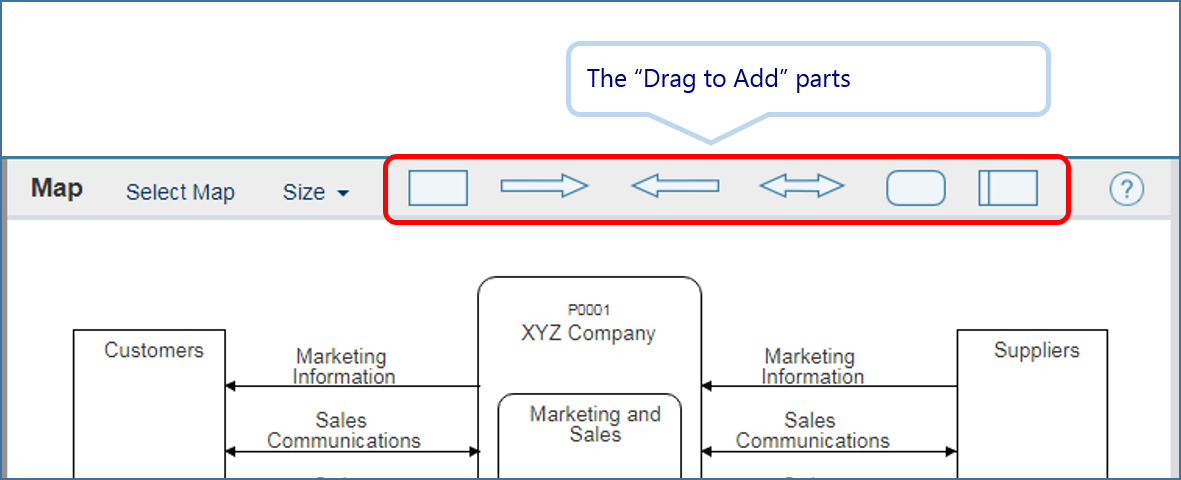
Drag and drop for adding is initiated by left-clicking on one of the Drag to Add parts, holding the mouse key down, and dragging the shape onto the map.
The Start of Drag - the "Drag Clone"
A "drag clone" is shown to help track the drag position
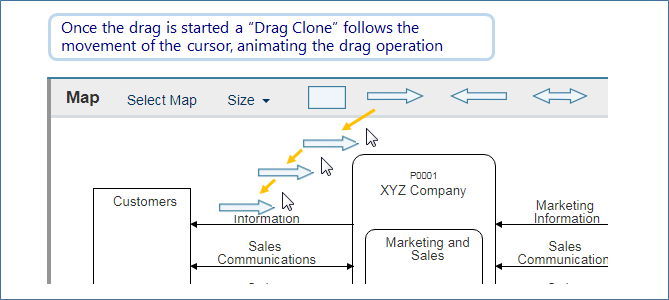
The drag clone also appears with "move" actions

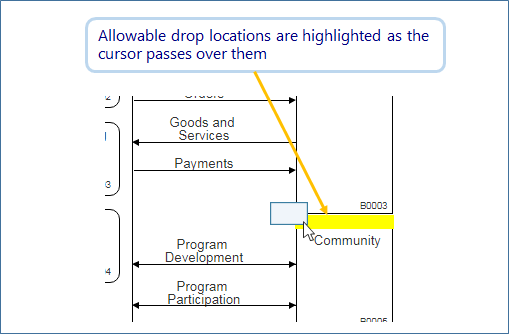
Highlighted Drop Zones
▪ Valid drop zones are shown by yellow highlighting when the part is dragged over them:
"Drop Targets" These are areas on the Map that:
▪ are highlighted in yellow when the cursor passes over them
▪ are usually directly above, below or inside other map parts
If there is no yellow highlighting, the drop does not occur.
This ensures that Map Parts are only added in their correct locations.
| Highlighted Drop Zones Example |
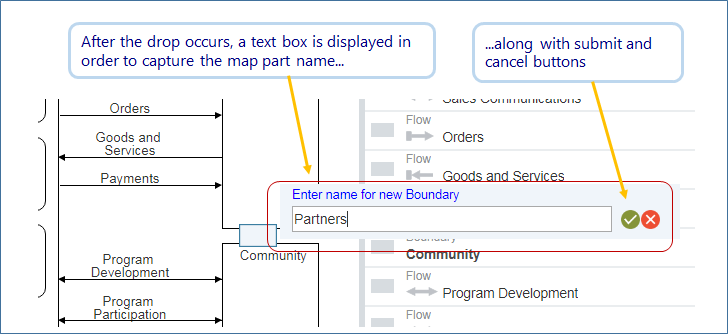
Doing the Drop▪ Drop is performed by letting the mouse button up. |
|
Drag Add Text Entry
Drag and Drop for Map Adds
▪ After adding and submitting the name of the new Map part, that part appears on both the List and the Map, just as if it had been added via a row menu on the List.
What Happens Next?

Drag and Drop to Move Parts
▪ Drag moves are performed in a similar way to Drag to Add Parts above.
▪ Users click and drag on existing Map Parts.
▪ Valid drop zones are highlighted in yellow when they are dragged over.
▪ Since the operation is a move, no name entry field is displayed.
▪ The move operation is reflected in the List following the same rules as if the move had been initiated from a row menu.
Special Case for Moving Sub-Processes
In the current version of the software, sub-processes cannot be moved between the Central Process and the Side Columns.
However, these moves can be made using List Row Menus.
EXCEPTION: Side-Processes that have flows attached to them cannot be moved to the Central Process.
Suggested Next Pages
Group Session Activity Outline
Select Activity to Perform / Go to Next Activity
Create, Select and Change Work Products in Sessions
ActionMap "How It Works" Video
Help Table of Contents
Comments
To add or view comments about this article please go to the forum post at this link.
Comments
0 comments
Article is closed for comments.